
How to create a SMS Chatbot for Appointment Setting Using ChatGPT and Twilio
Setup this SMS Chatbot in 30 Minutes (Low Code)

Are you a small business that needs a SMS bot to help set up appointments with prospective customers that send your business a text message? Imagine being able to put a phone number in an ad to bring in leads for service estimates.
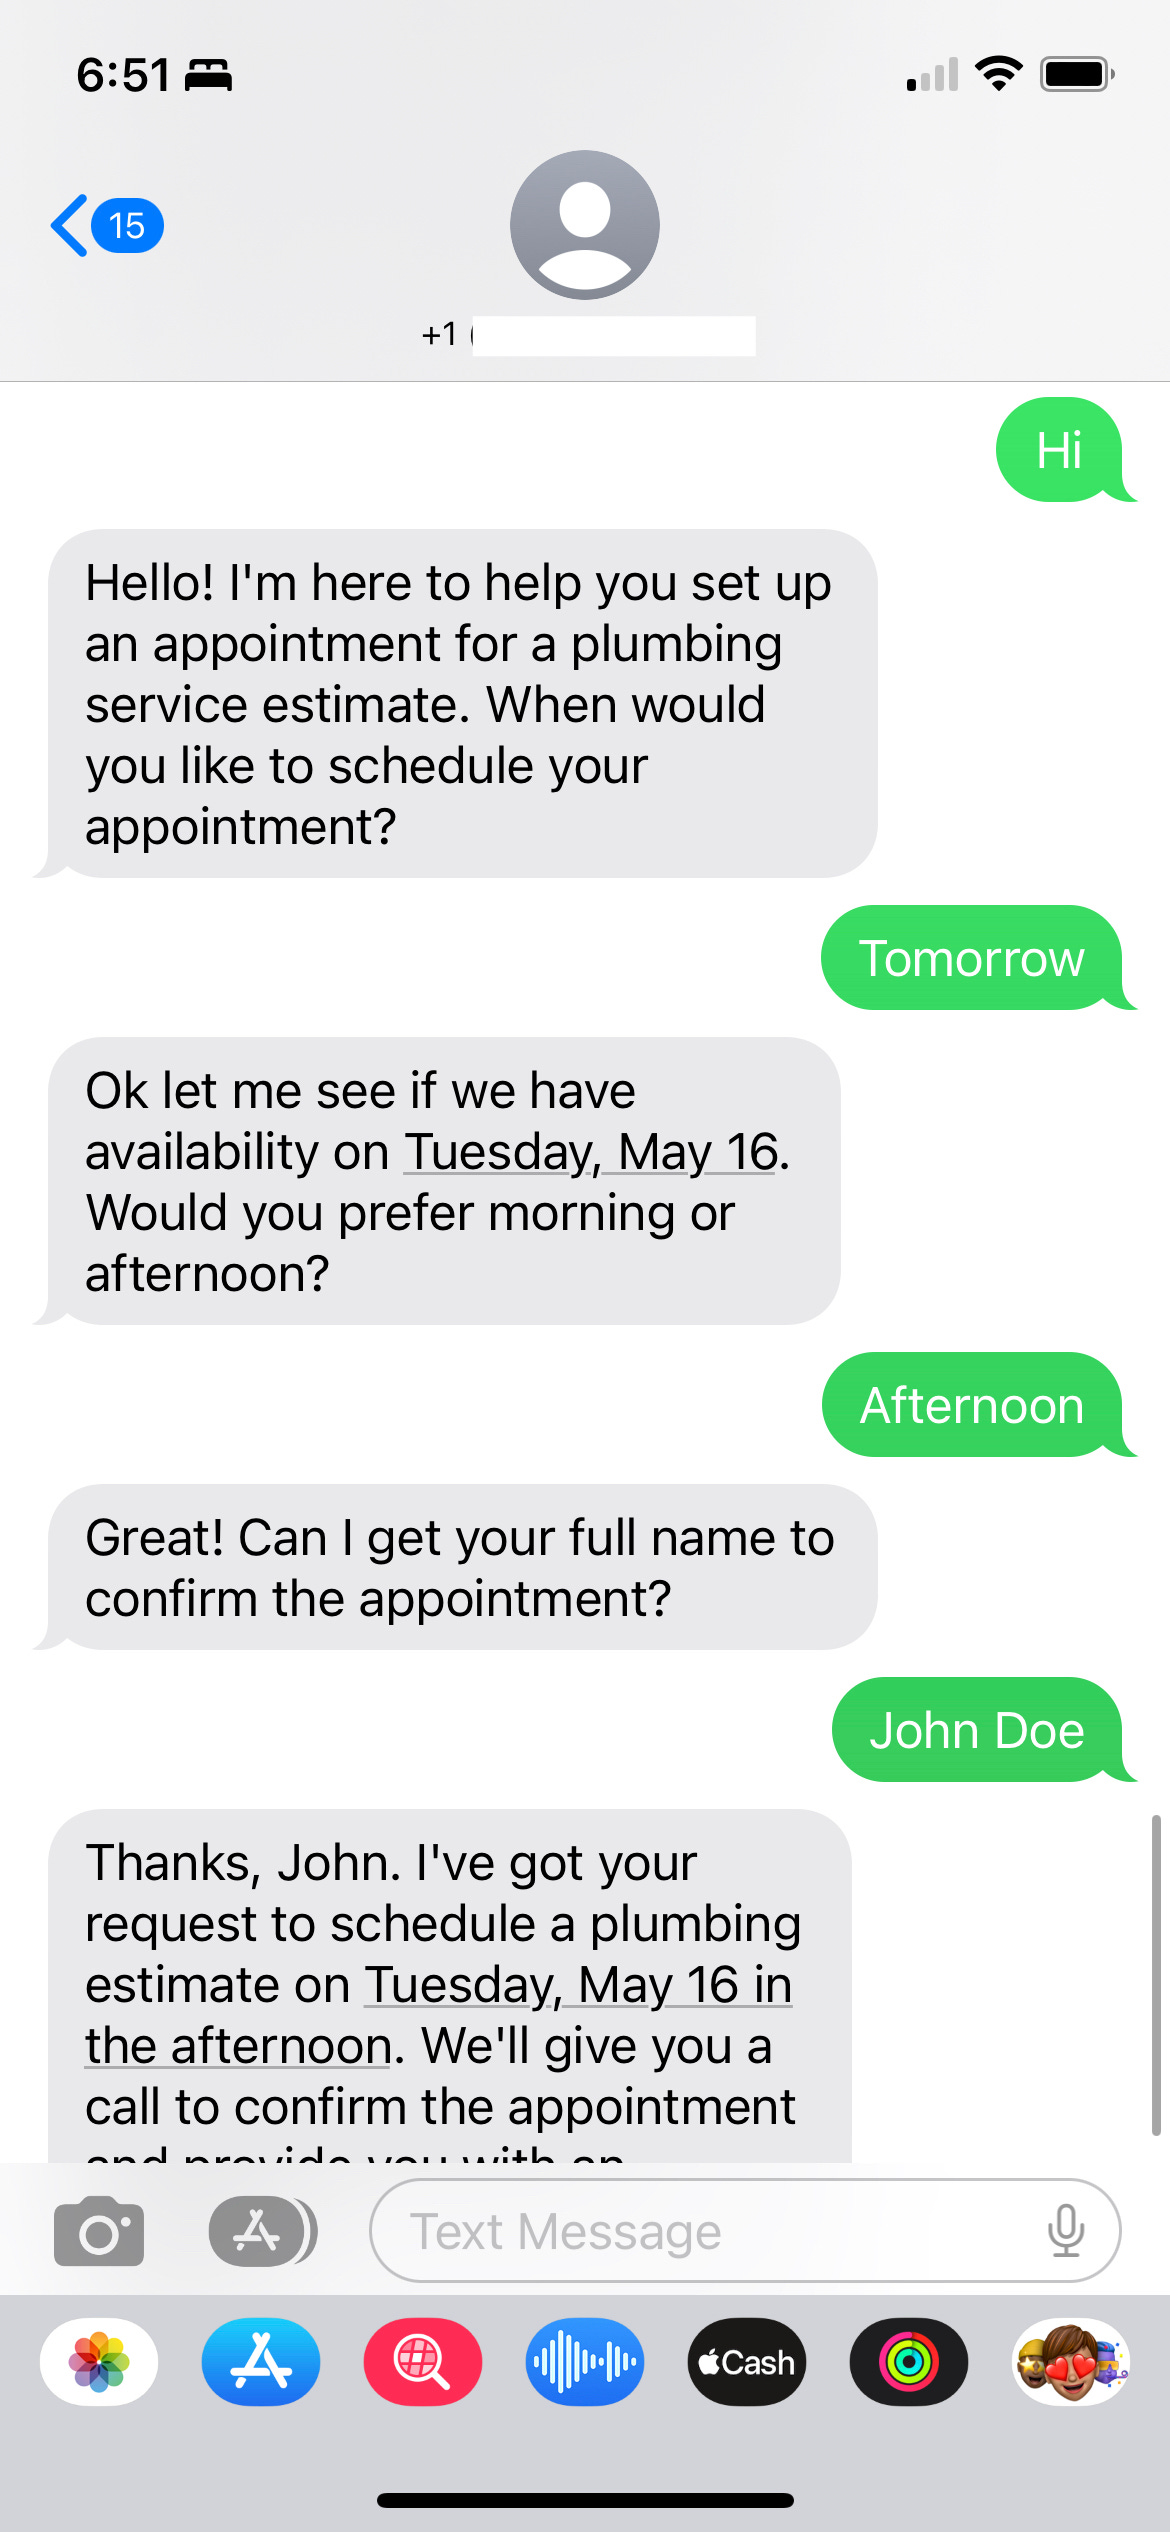
You can do that yourself today using Twilio and ChatGPT. Follow this complete step by step guide. No technical skills are necessary.
Want us to build this for you instead and customize it for your specific needs? Feel free to reach out!
At a high level you will be:
Setting up a Twilio Studio Flow - this is the sequence of steps that defines the behavior of your chatbot. You can later modify this using a visual drag and drop tool called Twilio Studio
Creating Twilio Functions - Code you copy and paste into your Twilio account to do the work of extracting a date, time, and name from a prospect’s text messages. All essential info for setting up an appointment
Configuring your Twilio Studio Flow to Use Twilio Functions - After creating that code, you will then need to setup your chatbot to use them by making a few changes to your Twilio Studio flow
Connecting the Twilio Studio Flow to a Twilio Phone number - To make your SMS chartbot come alive, your customers need a phone number they can reach it at.
Twilio Studio Flow Setup
1. Create a Twilio account or log in if you already have one.
Click "Studio"
Click "Flows" to create a new Studio Flow

2. Create a new Flow

3. Name your flow "Appointment Setting Chatbot"
Open the Studio Flow JSON code in a new browser tab and copy the code.
Go back to the tab with your Twilio account open and paste it into the New Flow code editor window.

4. Once you've pasted the code, click "Next". You will then see a canvas with a bunch of widgets connecting to each other. This is a Twilio Studio Flow that describes a sequence of actions to take once someone sends a text to your Twilio phone number.

Create Twilio Functions
5. In a new tab, navigate to https://console.twilio.com/
Click "Functions and Assets"
Click "Services"
Click "Create Service" and name your service "appointment-chatbot"
Click "Next"

6. Let's get started by creating a Twilio Function, a piece of code hosted by Twilio, to extract a date from someone's text message.
Click Add and click Add Function from the drop down
Click "Add Function"
Name the function "/extract-dates" and hit Enter

7. Open https://github.com/chatbotjoy/twilio/blob/main/functions/extract-dates.protected.js in a new tab and copy the code. Replace the code in your open Twilio window with the copied code

8. Click "Save"

9. Now add 2nd function and repeat the same process. This function will be used to prompt the ChatGPT API to determine whether they'd like to have the appointment in the morning or afternoon.
Click "Add"
Click "Add Function"
Name the function "/extract-time" and hit enter.
Open https://github.com/chatbotjoy/twilio/blob/main/functions/extract-time.protected.js in a new tab and copy the code.
Replace the code in your open Twilio window with the copied code
![Screenshot of: Now add 2nd function and repeat the same process. This function will be used to prompt the ChatGPT API to determine whether they'd like to have the appointment in the morning or afternoon.
Click "Add"
Click "Add Function"
Name the function "/extract-time [[enter]]"
Open https://github.com/chatbotjoy/twilio/blob/main/functions/extract-time.protected.js in a new tab and copy the code.
Replace the code in your open Twilio window with the copied code](https://substackcdn.com/image/fetch/$s_!_E9K!,f_auto,q_auto:good,fl_progressive:steep/https%3A%2F%2Fsubstack-post-media.s3.amazonaws.com%2Fpublic%2Fimages%2F945fea8f-93ee-4498-982e-70d5897592da_1655x776.webp "Screenshot of: Now add 2nd function and repeat the same process. This function will be used to prompt the ChatGPT API to determine whether they'd like to have the appointment in the morning or afternoon.
Click \"Add\"
Click \"Add Function\"
Name the function \"/extract-time [[enter]]\"
Open https://github.com/chatbotjoy/twilio/blob/main/functions/extract-time.protected.js in a new tab and copy the code.
Replace the code in your open Twilio window with the copied code")
10. Click "Save"

11. Add one last new function by repeating the same process. This function will be used to prompt the ChatGPT API to extract someone's name from a text message.
Click "Add"
Click "Add Function"
Name the function "/extract-name" and hit enter.
Open https://github.com/chatbotjoy/twilio/blob/main/functions/extract-name.protected.js in a new tab and copy the code.
Replace the code in your open Twilio window with the copied code
![Screenshot of: Add one last new function by repeating the same process. This function will be used to prompt the ChatGPT API to extract someone's name from a text message.
Click "Add"
Click "Add Function"
Name the function "/extract-name [[enter]]"
Open https://github.com/chatbotjoy/twilio/blob/main/functions/extract-name.protected.js in a new tab and copy the code.
Replace the code in your open Twilio window with the copied code](https://substackcdn.com/image/fetch/$s_!RzPP!,f_auto,q_auto:good,fl_progressive:steep/https%3A%2F%2Fsubstack-post-media.s3.amazonaws.com%2Fpublic%2Fimages%2F53b363b3-22d2-4683-9db0-da45a13985e9_1563x733.webp "Screenshot of: Add one last new function by repeating the same process. This function will be used to prompt the ChatGPT API to extract someone's name from a text message.
Click \"Add\"
Click \"Add Function\"
Name the function \"/extract-name [[enter]]\"
Open https://github.com/chatbotjoy/twilio/blob/main/functions/extract-name.protected.js in a new tab and copy the code.
Replace the code in your open Twilio window with the copied code")
12. Click "Save" and then click "Dependencies" towards the lower left above the blue “Deploy All” button.

13. On the following screen, click the "Module" field and type "openai"

14. Click "Add" towards the right

15. Another empty "Module" field will then appear. Click the "Module" field and type "sherlockjs" then click "Add"

16. Click "Environment Variables" towards the lower left of the screen

17. In a new tab, navigate to https://platform.openai.com/playground and log in to your OpenAI account or create a new one if you don't have one. Once you're logged in, click on your username in towards the upper right hand corner of the browser window and select "View API keys" from the drop down menu.

18. On the next screen, click "Create new secret key"

19. A popup will appear prompting you to create a new secret key
Give it a name of "Twilio Appointment Chatbot"
Click "Create secret key" and copy the key

20. Go back to the tab with your Twilio account open with the environment variables section open
Add an environment variable named "OPEN_AI_API_KEY" and in the "Value" field paste the key you just copied from your OpenAI account
Then click "Add" to save it.

21. Once done, click "Deploy All" towards the lower left to make your changes live

Configure your Twilio Studio Flow to Use Twilio Functions
22. Go back to the tab with Twilio Studio open and click the widget named "extract_date"

23. Towards the right hand side of the canvas where you can see the configuration settings for the widget, modify this widget to use the code you previously created to extract dates from someone's text message.
Click on the SERVICE dropdown and select "appointment-chatbot"
Click the dropdown under ENVIRONMENT and select ui
Click on the FUNCTION dropdown and select "/extract-dates"
Click the "extract_date_2" widget to the immediate right of the "extract_date" widget and repeat the same steps as above.

24. Find and click on the widget named "extract_time". You will be configuring this widget to to use the code you previously created to extract the time from someone's text message.
Click on the SERVICE dropdown and select "appointment-chatbot"
Click the dropdown under ENVIRONMENT and select ui
Click on the FUNCTION dropdown and select "/extract-time"
Click the "extract_time_2" widget to the immediate right of the "extract_time" widget and repeat the same steps as above.

25. Find and click on the widget named "extract_name". You will be configuring this widget to to use the code you previously created to extract a name from someone's text message. Click on the SERVICE dropdown and select "appointment-chatbot" Click the dropdown under ENVIRONMENT and select ui Click on the FUNCTION dropdown and select "/extract-name" Click the "extract_name_2" widget to the immediate right of the "extract_name" widget and repeat the same steps as above.

26. Click "Publish"

27. To make your changes live, click the "Publish" button towards the top

Connect Your Twilio Studio Flow to a Twilio Phone Number
28. Next, you'll need to buy a Twilio phone number to connect this chatbot
Click "Phone Numbers" in the navigation menu on the left, click "Manager", and click "Buy a number"

29. On the next screen, you can either buy one of the phone number listed or search for one that has an area code you prefer. Once you decide on a phone number, click "Buy" next to it to initiate the purchase process

30. A popup window will appear confirming you want to buy the number.
Once you click buy, click the "Configure" button that immediately appears

31. On the phone number's configuration screen, scroll down towards the "Mesaging Configuration" section, click the dropdown with the title "A message comes in"
In the dropdown menu, select "Studio Flow" and on the immediate right click "Appointment Setting Chatbot" to connect this phone number to the chatbot you just created.
